7. Settings
After opening the settings page from the menu bar, the Settings page will appear. The page consists of two main parts: the settings menu (A) and the menu contents (B).
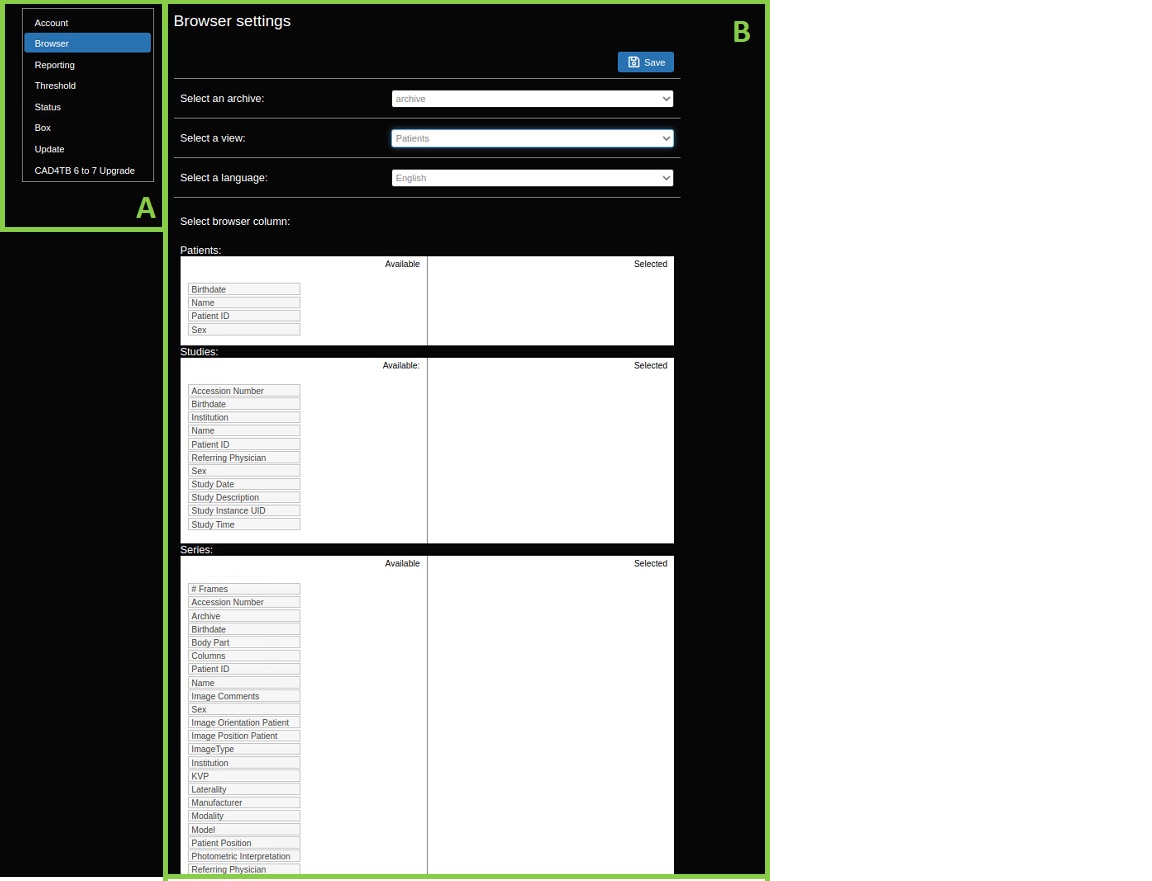
Fig. 7.1 Settings page
- (A) Settings menu
This menu gives access to the following settings: Account, Browser, Reporting, Threshold, Status [1], Box [1], um_settings_update, and um_settings_update_cad4tb.
- (B) Page content
Contains the contents of the selected settings page.
7.1. Account
Important
In order to change account settings, project / administrator permissions for at least one
project is required.
The account settings page consists of two tabs. The permissions settings tab, in which you can set permissions for a certain project and archive and the result settings tab, in which you can set permissions to see results.
7.1.1. Permission settings
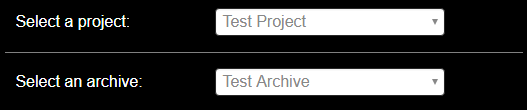
Fig. 7.2 Choose an archive
When changing the permission settings, you are first asked to select the archive for which you want
to change the settings. Only archives in projects for which you have project / administrator
permissions are shown.
Register new users

Fig. 7.3 Register a new user to the archive
In the account section it is possible to register new users. For registration, several cases can be distinguished:
New/inactive user: an account will be created. See accounts registration for more information.
Active user:
If the user has no view permission on the current archive, view permission will be given.
If the user has view permission to the current archive, nothing will change.
Permissions
Based on the user’s permissions, certain features/parts of the system are enabled or disabled. The following permissions are applicable:
Project: project level permissions:
project / administrator: Register new user accounts in this project. Get all other project permissions. Get all permissions for all archives in the project.project / upload: Upload new images to all archives in the project.
Archive: archive level permissions:
archive / administrator: Get all other permissions for the archive.archive / download: Download images and download meta data.archive / view: View images.archive / upload: Upload new images.
Result Types: result type permissions:
<result type> / view: View results of this type.
Box: box permissions:
BOXbox / root: Can (re)start/kill box related processes.
Changing permissions
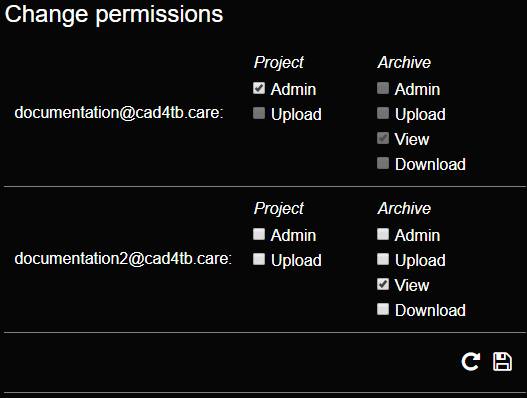
Fig. 7.4 Change user permissions
Next to the option to register a new user, a list is shown with all users in the project showing their current permissions (Fig. 7.4). To change the permissions of a user for the chosen project/archive, simply (un)check the wanted boxes and click . If you want to reset the form to the current user permissions, click . If you want to change the permissions of a user that is currently not in the archive, add the user to the archive following the steps above.
Certain permissions implicitly give users also other permissions (for example a project admin has all other permissions). In this case the implicit permissions are greyed out.
Box permissions BOX: If a user has box / root permissions he can also set that permission for the
other users.
7.1.2. Result settings
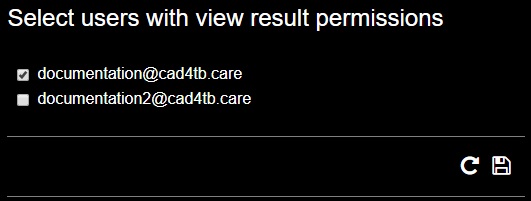
Fig. 7.5 Change result permissions
In the result settings tab it is possible to set users’ permissions to see the computed results. To give a user permissions to see computed results check the box next the user’s name and click . If you want to reset the form to the current user permissions, click . Currently, giving a user permissions to view results, gives them permission to see the computed CAD4TB score and Texture heatmap.
Important
Changing result permissions is not bound to any archive. Giving a user result permissions in one
archive, means they can see the results for all archives for which they have archive / view
permissions.
7.2. Browser
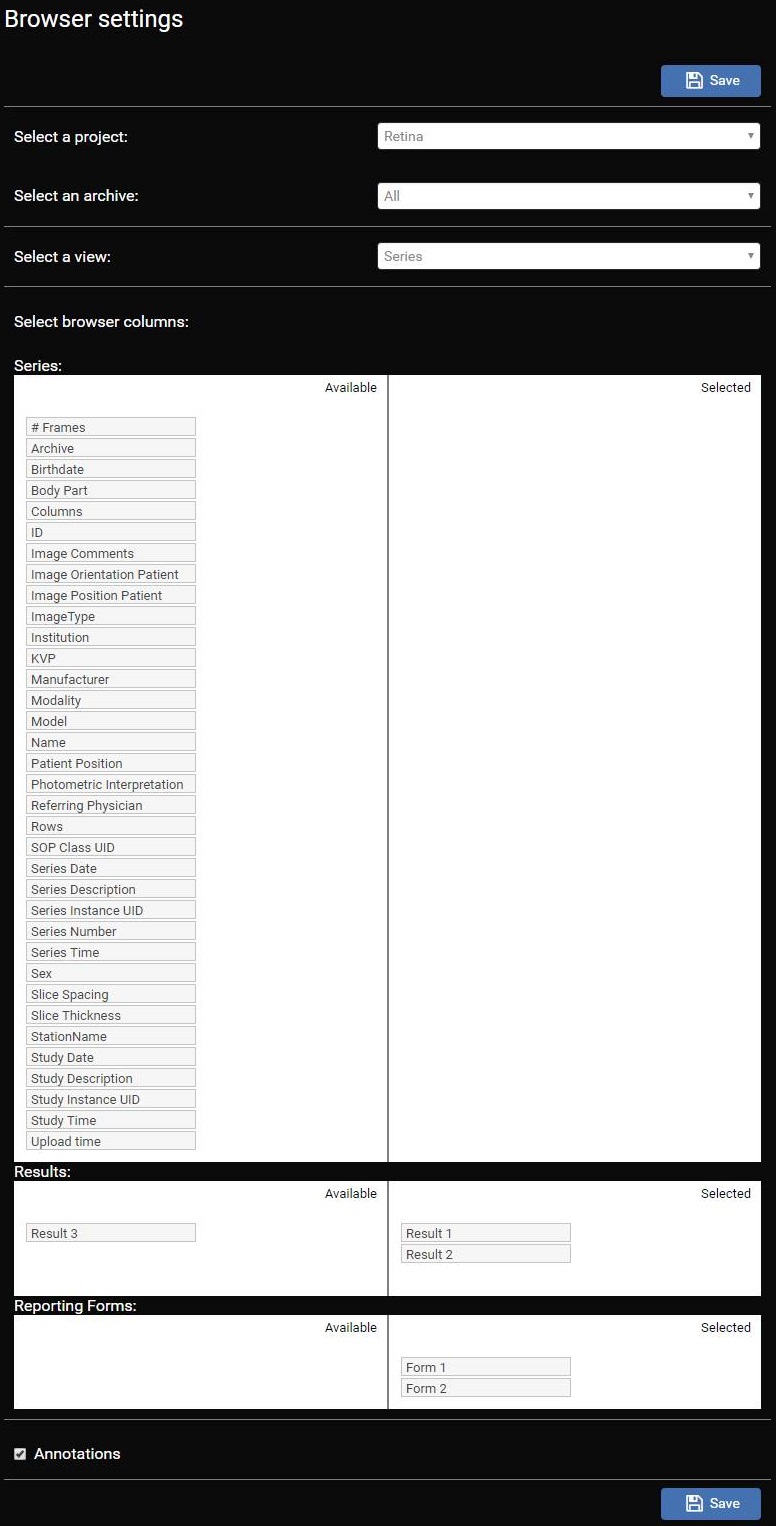
Fig. 7.6 Browser settings page
On this page, you can configure which archive is shown, which work lists are shown on the Browser page, and which columns they contain and in what order. The following settings are available:
- Select a project [2] and archive [3]
To configure which project is shown, choose a project from the drop-down menu. To configure which archive is shown, choose an archive from the drop-down menu. When the option ‘All’ is chosen all cases in the chosen project for which the user has
viewpermission will be shown.
- Select a view
To configure which work lists are shown, choose a view from the drop-down menu.
- Select browser columns
To configure which columns are shown in the work list, drag the column name from the Available section and drop it to the Selected section, to add a column, and vice versa to remove a column. If no columns are selected, the default setting will be used. To change the order of the columns in the work list, change the order of column names in the Selected section.
Column type Patients is only shown when view Patients is chosen. Column type Studies is only shown when view Patients or view Studies is chosen. Column type Results is only shown when it is available for the current user.
Column type Reporting Forms shows Form 1 and Form 2. The exact contents from these forms depend on the selected archive. In the browser the name of the reporting form will be shown.
For information on the meaning of different columns please refer to the Dicom standard.
- Save settings
To save the chosen settings, press the blue save button on the top or the bottom of the page. You are automatically redirected to the homepage with the chosen settings.
7.3. Reporting
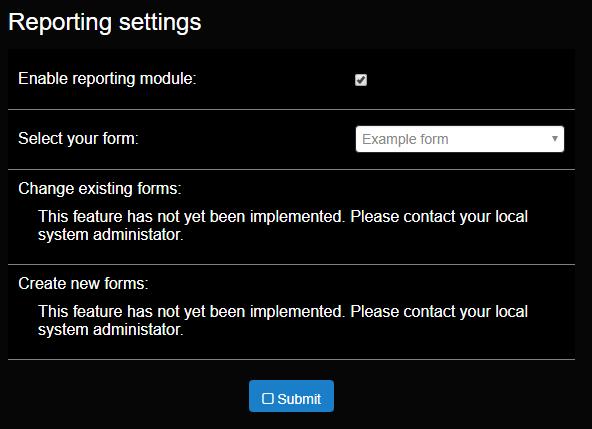
Fig. 7.7 Reporting settings page
On this page, you can configure whether a report is shown on the Viewer page, and which report form is shown. To show/hide the reporting functionality, check/uncheck Enable reporting module. When done, click the Submit button. Your settings are successfully saved when the icon is shown.
To configure which report form is shown, choose a report form from the Select your form drop-down menu. When done, click the Submit button. Your settings are successfully saved when the icon is shown.
If you want a summary of the form to be shown in the browser, make sure it is selected in the browser columns. To add a new form, or change an existing form, please consult the service manual.
7.4. Threshold
This page shows the current selected threshold for archive/project. The threshold value is essential for the performance of the CAD4TB system. Setting an optimal threshold is critical to balance sensitivity (the ability to correctly identify positive cases) and specificity (the ability to correctly identify negative cases). If the threshold is too low, the system may produce more false positives, leading to unnecessary additional testing. If the threshold is too high, the system may miss true positive cases, leading to missed diagnoses.
The dichotomize threshold is used as an input for the CAD4TB Report (Likely TB/Unlikely TB). CAD4TB Score values greater than or equal to the threshold will have a value matching that of “Dichotomize positive (Likely TB)” otherwise the value of “Dichotomize negative (Unlikely TB)” will be used. Entering no value for the threshold will disable this functionality.
Dichotomize positive: The value used to represent a “Positive” CAD4TB case.
Dichotomize negative: The value used to represent a “Negative” CAD4TB case.
Finding a threshold value for a specific project and population can be a challenging tasks. Moreover, the threshold value can also vary per CAD4TB version. It is important to highlight that the threshold not only depends in specificity and sensitivity, but also in the number of available test per project. The initial threshold for all installations is 60.
The threshold section allows the user to calculate a threshold based on the amount of lab test available per day. For a more thorough verification study based on a target sensitivity and specificity, contact info@delft.care. Delft AI will provide the necessary guidelines an tools to conduct such study.
7.5. Status BOX
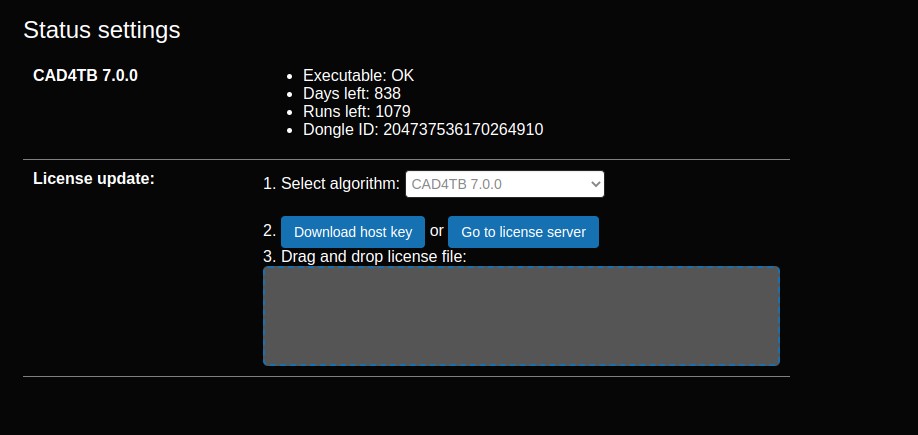
Fig. 7.8 Algorithm status page
This page shows the status of each of the installed algorithms. The following information is listed for each algorithm:
Status: can the algorithm status file be located on disk?
Executable: can the executable be located on disk?
License: status of the license. If a code is shown, please check Table 8.1 with possible errors.
Runs left: number of times the algorithm can be executed. If 0, please consult the license renewal section in the user manual.
Days left: number of days before the software expires. If None, the license will not expire.
SettingsFile: status of the settings file.
Dongle ID: the ID of the dongle used [optional]
When multiple algorithms are installed, a drop-down menu is shown that lists all the algorithms. Choose the algorithm for which you want to update the license. After choosing, all buttons as shown in the image will be available. See License BOX for more information on how to update licenses.
7.6. Box BOX
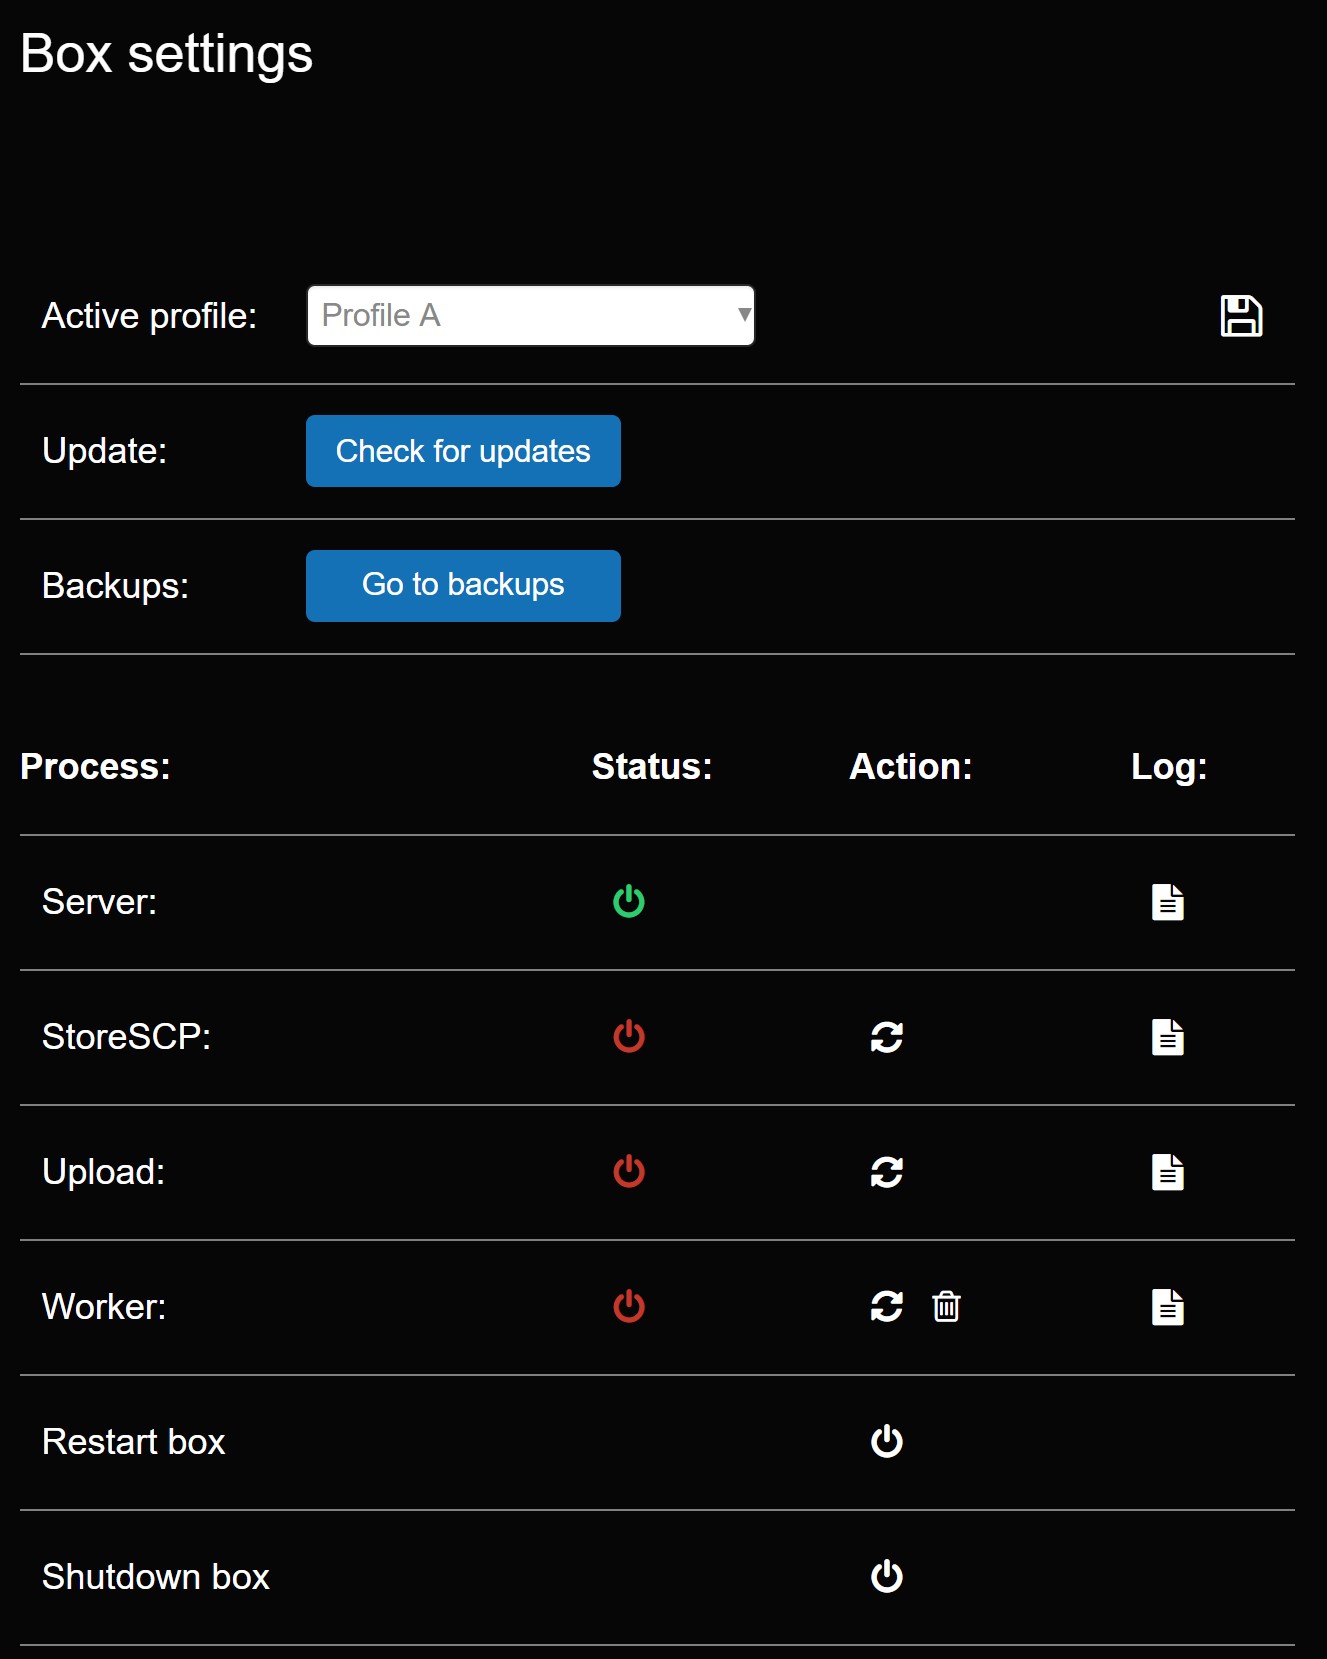
Fig. 7.9 Box status page
The box settings page makes it possible to change the current profile, update the software of the box, make a backup and monitor or restart box related processes.
7.6.1. Profile
The collection of settings used for the box are set in a so called profile. These settings pertain to the upload, update, worker and archive. Whenever there is only one profile available, this checkbox will not be available. For more information, consult the service manual.
7.6.2. Updates
Press the Check for updates buttons to check for available updates. A checking for updates message will appear (Fig. 7.10).

Fig. 7.10 Checking for updates
After checking for updates, the message will change and show the status of the check. In case updates are not available, you can check again later. In case updates are available, the Update now button should be pressed to start the update process. A countdown timer is shown and the process takes approximately 5 minutes depending on the internet connection speed. Afterwards, the box should be restarted manually.
Important
The box should be connected to the internet in order to check for updates.
Important
The box should be restarted after applying updates.
Possible issues
The keeps spinning:
Check the connection indicator to verify that the machine has an active internet connection.
Make sure the update credentials are correct
7.6.3. Backups

Fig. 7.11 Open the backups page.
To go to the backups page, click the Go to backups button (Fig. 7.11). This page (Fig. 7.12) contains two sections:
Backup creation section (A)
Backup overview section (B)
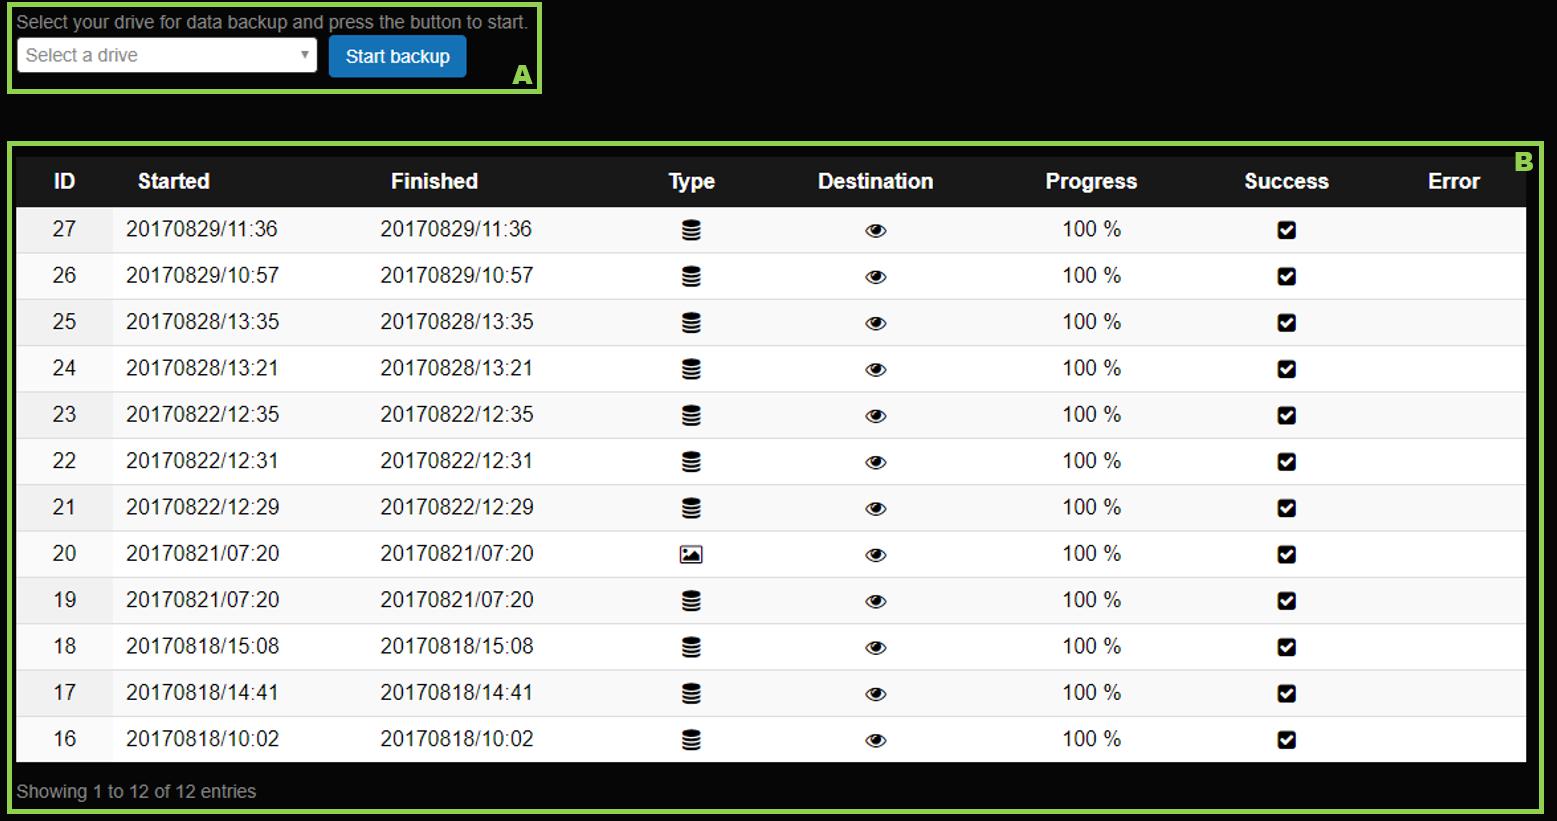
Fig. 7.12 Backups page.
7.6.3.1. Backup creation
To create a new backup, select a backup destination from the drop-down menu and press the Start backup button (A). A new folder (CAD4TBBox_backup) will be created on the selected disk where the backup will be stored. After clicking the button, the backup will also be shown in the backup overview (B).
7.6.3.2. Backup overview
The backup overview (B) will show a list of all created backups containing the following information:
- Started
Date and time the backup was started.
- Finished
Date and time the backup was finished.
- Type
Type of the backup. This can either be database () or image ().
- Destination
Destination of the backup. Hover the mouse pointer over the icon, to see the location of the backup.
- Progress
Progress of the backup. In case it is still in progress, a is shown.
- Success
Whether or not the backup was successful.
- Error
A possible error message in case the backup was unsuccessful. Hover the mouse cursor over the icon to see the error message.
Note
Each time the box is updated, a new database backup is created and will be shown in the overview.
7.6.4. Processes
The full application runs several sub-processes in order to function correctly. Each of these processes is listed and the status is shown by the icon: green (running) or red (stopped). Some of the processes can be restarted by clicking the icon. To show the log file, click the icon. This will show todays log file.
Explanation of listed processes:
- Server
The application itself. This will always be running.
- StoreSCP
Image transfer from the modality (X-Ray scanner) to the box.
- Upload
Image upload from the box to the cloud server.
- Worker
Image processor using configured algorithms. All tasks will be put in queue, which can be emptied with the icon.
Possible issues
Uploading an image to the cloud requires a working internet connection, please verify through the connection indicator that your machine is connected to the internet before uploading images.
Additional functionality:
- Restart box
Restart the application: press .
- Shutdown box
Shutdown the hardware press .
7.6.5. WiFi
For surface devices the box settings page will show a dropdown menu to control the WiFi. This menu will give the following options:
Hotspot: This will turn of the connection to the router and turn on the hotspot of the surface this hotspot will have the following SSID “CAD4TBBOX-HS”
Router: This will turn of the hotspot of the surface and try to connect to the CAD4TBBOX router.