4. Viewer
The viewer tab shows the image(s) that have been opened in the Browser. This tab can show 1, 2 (vertical) or 4 viewports. Each viewport contains an image and an image menu bar with the available tools for the image.
4.1. Layout
Depending on the number of viewports that are shown, the layout of the tab may differ. An image of a standard viewport is shown in Fig. 4.1.
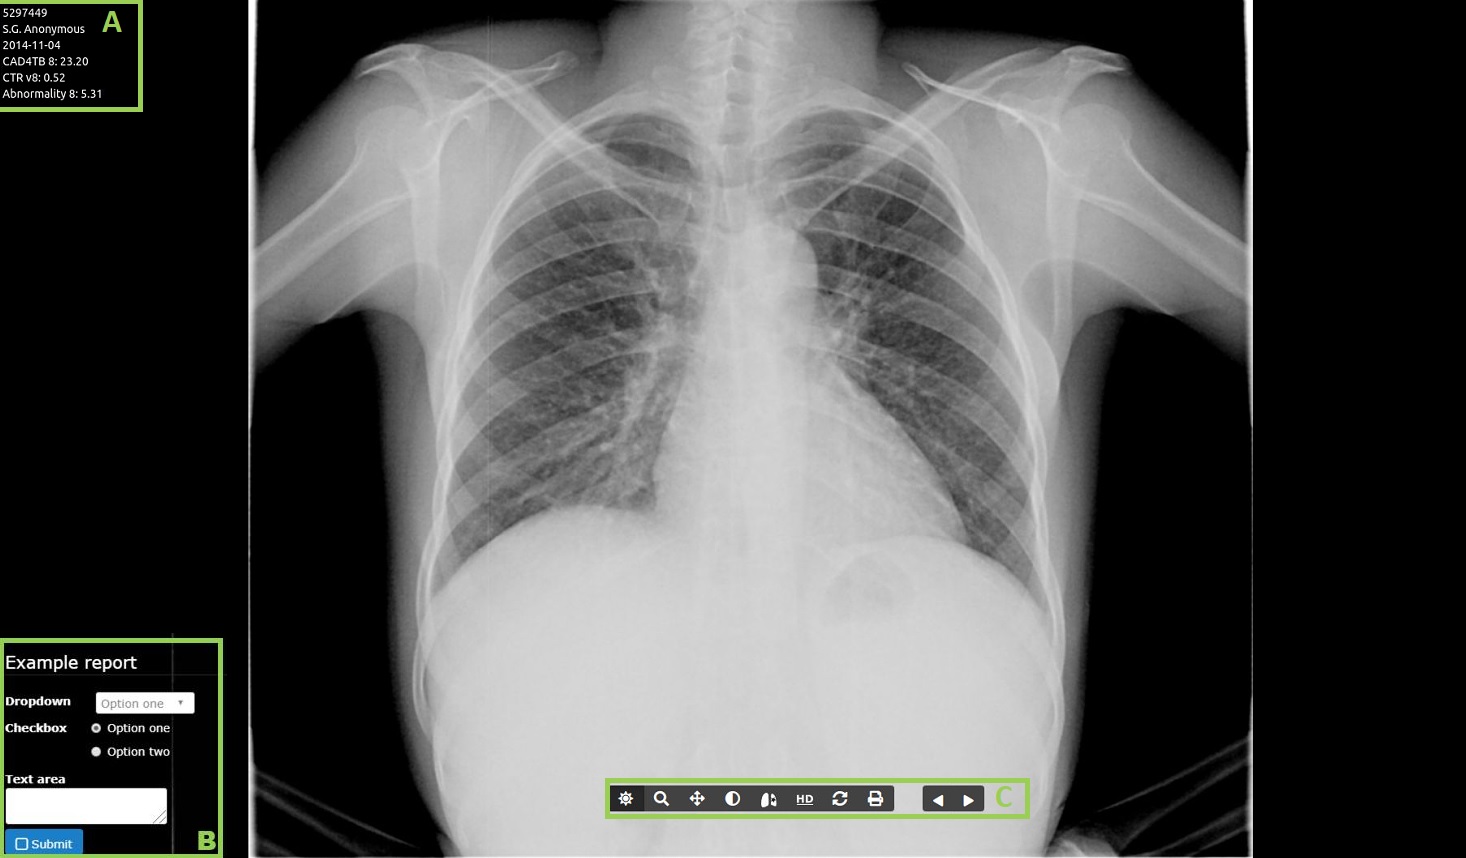
Fig. 4.1 Viewport
The viewport is divided into a number of sections:
- (A) Meta data overlay
This overlay shows the image’s metadata. The following patient’s information is shown: ID, name, study date, results [1]
- (B) Reporting form
Shows the reporting form. Whether the form, and which form is shown, depends on the reporting settings.
- (C) Image menu bar
Shows all the tools that are available for the image. Availability depends on the type of image, results, and Installation type.
4.2. Functionality
4.2.2. Printer BOX
On Box installations, a printer connected to the box via USB can be used as a network shared printer. This printer would only be accessible via a device on the same local network as the box. To print via this printer:
Use a browser (such as Chrome) and navigate to the page you wish to print. (eg. a DICOM image)
Use the print functionality of the browser and select the shared printer.
Configure the page/print details as necessary and start the print using the shared printer.
For example for Chrome on mobile devices go to ⋮ > Share > Printer, or for Chrome on Windows go to File > Print (Crtl + P).
4.2.3. Reporting
The viewport can contain a reporting form on the lower-left corner (B) of the screen. To enable the form, and to choose the form that is shown, visit the settings page. To edit or create new forms, consult the service manual.
If the form has not been filled in previously, it will be empty or contain default values. After filling in the form, press the Submit button or Enter key to submit the report. Once the icon has changed to , the report has been successfully submitted.
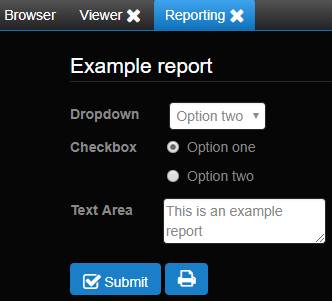
Fig. 4.2 Reporting in separate tab
It is also possible that the reporting module opens in a separate tab or a separate window. In a separate tab or window it is possible to print the report as PDF. To print the report, the form needs to be submitted first, after which the print button will appear. Clicking this button will generate a PDF with patient information and the information from the form.
Note
When the form is opened in a separate window, you will need to accept pop-ups in your browser.
A default template for the PDF is available for all forms, if you need a custom template, please consult the service manual.
4.2.3.1. Other users
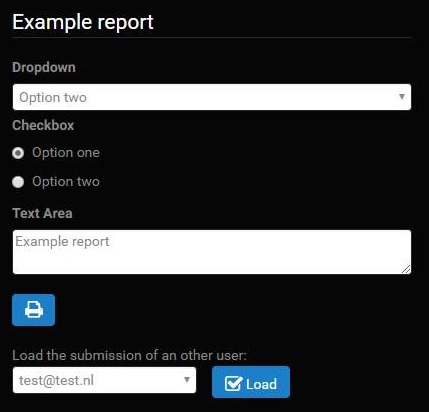
Fig. 4.3 Opening submission of other user
For users with archive / admin permissions it is possible to load the submissions of other
users when the form is opened in a tab or a pop-up. When the form is loaded in the bottom a
drop-down appears with all users that have already submitted this form (Note that if no users have
submitted anything, the drop-down will not appear). By selecting a user and clicking ‘Load’, the
submission of the selected user will be loaded. If the form of another user is loaded, it is not
possible to save the changes. Printing the submissions is enabled.